Welcome the continuing series on using Jekyll. In this tutorial we are going to setup your MAC (OSx) computer to be able to edit your blog on your computer.
Overview
Up to this point we have been using the Github web site to edit all of our files but the downside to this is that any chances you want to make show up live in your blog before you have had a chance to test them.
Instead, it is better if you can test out all of your changes and review your blog post before letting the world see them. It will also let you have draft post where you can see them locally but on github they will not be visible.
Section 1: Installing Software
We need to install XCode command line tools, nodejs and python pip.
Section 1.1: Installing NodeJs
Head over to nodejs.org and download the NodeJs Installer and run it. Take all of the defaults.
Section 1.2: Installing XCode Command Line Tools
Unfortunately to get the XCode command line tools, you first need to install XCode.
- Go the App Store
- Search for XCode
- Hit the Install Button
Once XCode is installed, open up a terminal windows (Application -> Other -> Terminal) and run the following command:
xcode-select --install
This will bring up a windows asking you to install the command line tools package that we need and just click the Install button.
Section 1.3: Installing Pygments Code Highlighter
pip install Pygments
Section 1.4: Install Ruby Gems
sudo gem update --system
sudo gem install bundler
Section 2: Getting your Blog onto your computer
In this section, you will clone the blog repo from github and install jekyll.
Open a terminal
Create the directory ~/projects
mkdir ~/projectscd into c:\projects
cd ~/projectsClone your github blog repo to your local machine with the “git clone [Repo Name]” command. Below is the example if you were to clone the jekyll repo for this blog series.
git clone https://github.com/digitaldrummerj/jekyllforblogseries.gitcd into the repo that you just cloned
cd jekyllforblogseriesMake sure that you have a GemFile with no file extension in the root of your repo with the following contents. Warning that Github Pages supports very few jekyll plugins. The jekyll-redirect-from is one of them.
 source 'https://rubygems.org'
 gem 'github-pages'
 gem 'jekyll-redirect-from'
From the jekyllforblogseries directory or your blogs directory, run the following command to install gems listed in the Gemfile.
bundle install
Now we have jekyll installed. Time to test it out
Section 3: Testing Your Blog Works on Your Computer
Now that we have everything installed for jekyll it is time to test it out.
From a command prompt in your blog repo directory run the following command to tell jekyll to build and run the web site locally
jekyll serveIf it build successfully you will see something like this
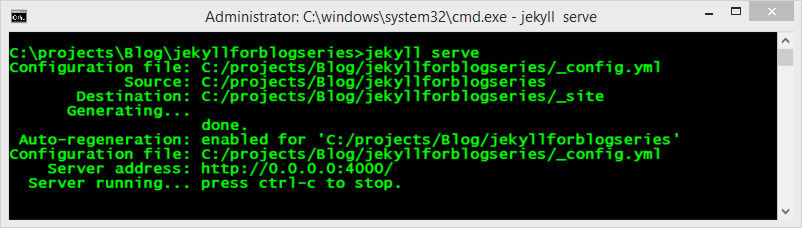
Now if you open up your browser and navigate to http://localhost:4000 you will see you blog.
However, by default your _config.yml file will be set for production which will cause any place that you have referenced the site.url to not working on your local machine. You don’t want to change your _config.yml file though for development since you will accidentally check it in at some point and break your blog. Instead we can tell jekyll to use multiple configuration files. When you load multiple files it will load them in order and then override any settings from a previously loaded config.
Create a new file in the root of your repo called _configdev.yml
In the _configdev.yml add the following lines to set the url, turn off disqus/google analytics and google search.
 # then add this to the url as well "/repository-name"
 url: http://localhost:4000
 disqus:
 disquscommentcount:
 google_analytics:
 google_search:
If your jekyll serve is still running do a ctrl+c to stop it.
Now run the following command to tell jekyll the config yml files to load
jekyll serve --config _config.yml,_configdev.ymlIf it build successfully you will see something like this
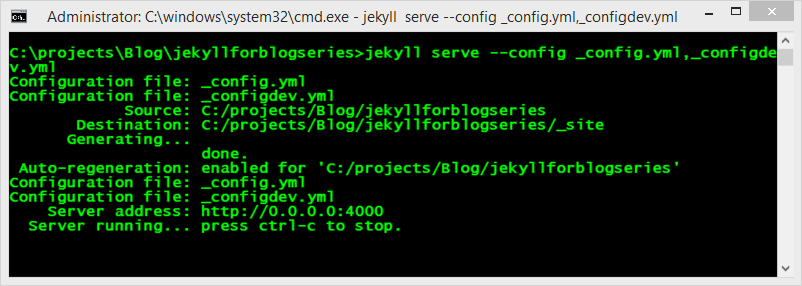
Now if you open up your browser and navigate to http://localhost:4000 you will see you blog and any place that reference site.url will be working.
Conclusion
Now you are ready to do all of your editing locally and test it out before the world gets to see it.
In our next lesson, I will show you how to create draft blog post that will only show on your local machine so that you don’t have to either clutter up your post directory with drafts or worry about accidentally publishing an unfinished article.