Welcome the continuing series on using Jekyll. In this tutorial we are going to go through how to create the series listing like you see for this blog series.
Overview
Sometimes a blog post gets too big and you need to split it into multiple articles or you want to do a series like this one that builds upon each other but you don’t want to have to manage a listing of all of the post in the series. Instead you can easily create a liquid template that does all of the work for you.
Section 1: Creating the Template
In this section we are going to create the html template that will get the series listings for you.
Note: I assume that you have alrady cloned your jekyll repo to your machine. This tutorial is based off the jekyll repo at https://github.com/digitaldrummerj/jekyllforblogseries.
In the _includes directory create a new file called series.html
The first thing we are going to do is add an if statement to make sure that the it is a series before trying to output the listing. Without this, it would output every page if the post didnt have a series and you included the series.html
 {% if page.series %}

 {% endif %}
All of the code for the rest of this section will go in between the if and endif statements
Next we are going to figure out how many post are part of the series and which article number in the series this post is.
Total count will store in the count variable
The article number for this post in the idx variable.
We will loop through the post and increment the count if the Front Matter series tag match the current page’s series tag.
  {% assign count = '0' %}
  {% assign idx = '0' %}
  {% for post in site.posts reversed %}
  	{% if post.series == page.series %}
  		{% capture count %}{{ count | plus: '1' }}{% endcapture %}
  		{% if post.url == page.url %}
  			{% capture idx %}{{count}}{% endcapture %}
  		{% endif %}
  	{% endif %}
  {% endfor %}
Now we need to output the actual html code.
Note: We are using the panel css from bootstrap. If you have bootstrap you are good, if not we will add just the panel css in the next section.
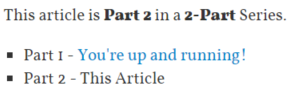
First, we output a header for the series that says which part # this post is and how many total parts there are for the series.
Second, we loop through the post and increment the count if the Front Matter series tag match the current page’s series tag so that we can append Part # onto each post title. If the url for the post in the series matches the current page’s url, then it outputs “This Article” instead of the actual title.
  <div class="panel seriesNote">
  	<p>
  	This article is <strong>Part {{ idx }}</strong> in a <strong>{{ count }}-Part</strong> Series.
  	</p>
  	<ul>
  	{% assign count = '0' %}
  	{% for post in site.posts reversed %}
  	{% if post.series == page.series %}
  		{% capture count %}{{ count | plus: '1' }}{% endcapture %}
  		<li>Part {{ count }} -
  		{% if page.url == post.url %}
  			This Article
  		{% else %}
  			<a href="{{post.url}}">{{post.title}}</a>
  		{% endif %}
  		</li>
  	{% endif %}
  	{% endfor %}
  	</ul>
  </div>
In the next section, we will add the series listing onto a couple of post so you can see them in action
Section 2: Add Series Tag to Post
The first thing we need to do is create 2 new blog post article so that we can add the series to them.
In both articles, add a front matter tag called series and make the value “Intro to Series”.
 ---
 layout: post
 title: You're up and running!

 series: "Intro to Series"
 ---
In both article, include the series.html at the point in the html that you want the series listing to show.
{% include series.html %}Now run jekyll serve and view one of the new blog post.
If you do not have the bootstrap css include in your blog, then you will notice that the series listing does not stand out at all.
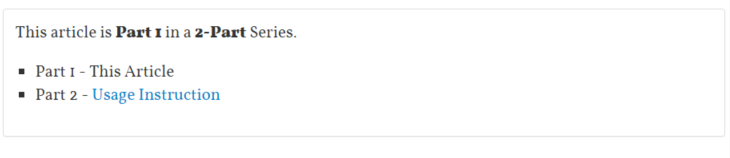
In the next section we will add the missing panel css to make it look more like this.
Section 3: Adding CSS
In this section we will add in the css to make the series listing stand out and look like it is a section that goes together instead of just some text on the page.
Open the css\style.scss file
At the bottom of the file paste in the following CSS. This css is directly from the bootstrap css. I didn’t want to include all of the bootstrap framework just for the panel css.
 .panel {
 	padding: 15px;
 	margin-bottom: 20px;
 	background-color: #fff;
 	border: 1px solid #ddd;
 	border-radius: 4px;
 	-webkit-box-shadow: 0 1px 1px rgba(0,0,0,0.05);
 	box-shadow: 0 1px 1px rgba(0,0,0,0.05)
 }

 .panel-heading {
 	padding: 10px 15px;
 	margin: -15px -15px 15px;
 	background-color: #f5f5f5;
 	border-bottom: 1px solid #ddd;
 	border-top-right-radius: 3px;
 	border-top-left-radius: 3px
 }

 .panel-title {
 	margin-top: 0;
 	margin-bottom: 0;
 	font-size: 17.5px;
 	font-weight: 500
 }

 .panel-footer {
 	padding: 10px 15px;
 	margin: 15px -15px -15px;
 	background-color: #f5f5f5;
 	border-top: 1px solid #ddd;
 	border-bottom-right-radius: 3px;
 	border-bottom-left-radius: 3px
 }

 .panel-primary {
 	border-color: #428bca
 }

 .panel-primary .panel-heading {
 	color: #fff;
 	background-color: #428bca;
 	border-color: #428bca
 }

 .panel-success {
 	border-color: #d6e9c6
 }

 .panel-success .panel-heading {
 	color: #468847;
 	background-color: #dff0d8;
 	border-color: #d6e9c6
 }

 .panel-warning {
 	border-color: #fbeed5
 }

 .panel-warning .panel-heading {
 	color: #c09853;
 	background-color: #fcf8e3;
 	border-color: #fbeed5
 }

 .panel-danger {
 	border-color: #eed3d7
 }

 .panel-danger .panel-heading {
 	color: #b94a48;
 	background-color: #f2dede;
 	border-color: #eed3d7
 }

 .panel-info {
 	border-color: #bce8f1
 }

 .panel-info .panel-heading {
 	color: #3a87ad;
 	background-color: #d9edf7;
 	border-color: #bce8f1
 }
Save the file
Run jekyll serve and view one of the new blog post. If should look like this:
Conclusion
Now if you do an article series, you can easily have a professional looking series listing and it requires very little to get it working.
In the next lesson, I will show you how to get the code highlighting working when your code includes liquid syntax such as we did in the code examples in this article.