HUGO_VERSION = “0.141.0"site every time we pushed a commit to our GitHub repository. As well, we set up a custom domain for our site.
In this post, we will look at the preview deploy feature of Netlify to build and deploy to a preview/staging site when we create or update a pull request.
When you create a new Netlify site, a preview site is set up out of the box to build every time you create or update a pull request. The build configuration will match the configuration of your production site. It is fantastic that Netlify set this up for us. However, to take full advantage of having a preview site, it would be helpful to include future and draft posts to make sure they look right before publishing them to production. It would also be nice to be able to test new versions of Hugo in a preview environment before updating production.
Verify Preview Builds Are Enabled
Before we dive into how to have different configurations for your preview site, let us verify that you indeed have the preview builds turned on.
Login to Netlify
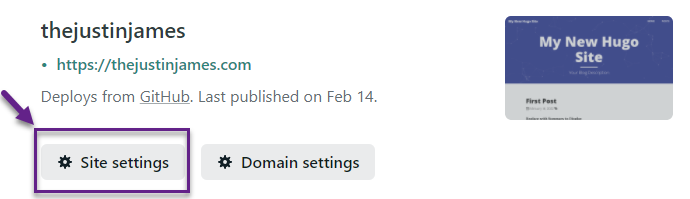
Under the Sites section, click on your site
Under your site, click on the site settings
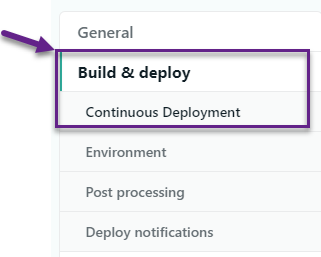
On the side menu, select Build & Deploy and then Continuous Deployment
Scroll down to the Deploy Previews section and click on Edit settings

Under the Deploy Previews settings, you should see that it is set for “Any pull request against your production branch / branch deploy branches” and the Netlify Drawer is set to Enabled (more on Netlify Drawer later in this post)
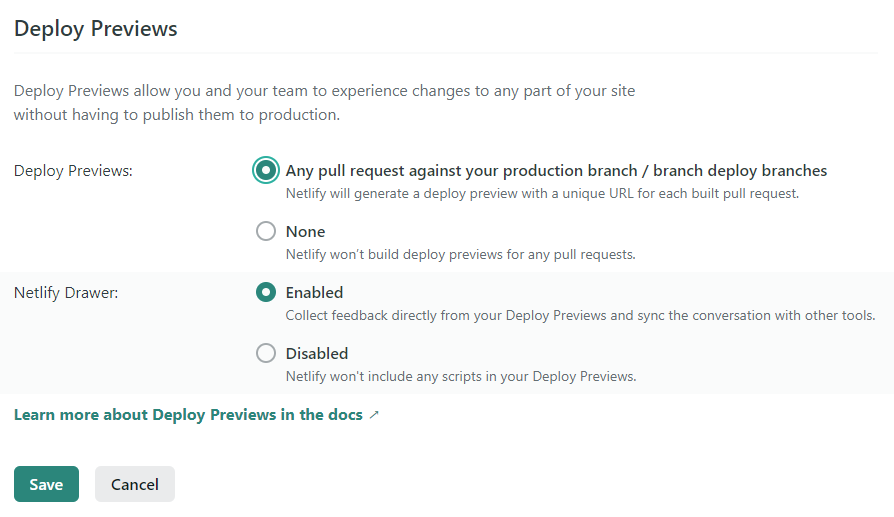
Click Save on the Deploy Previews settings
Netlify Preview vs. Production Configuration
Now that we have confirmed that our preview builds are enabled, let’s look at how to have different build settings for production vs. preview.
To have different settings, we will create a file in the root of our site named netlify.toml. The netlify.toml file will set the build command and hugo version for each environment.
First in the netlify.toml file, we need to add the configuration to set the default publish directory, the build command, and the hugo version to use.
# This will be your default build command
[build]
publish = "public"
command = "hugo --environment production --gc --minify"

[build.environment]
HUGO_VERSION = "0.141.0"
HUGO_ENV = "production"
HUGO_ENABLEGITINFO = "true"
Now, let’s set our preview deployment to have a different build command that will build future posts, draft posts, and update the baseUrl to our preview url so that any links that reference the baseURL continue to work.
# This will be your preview build
[context.deploy-preview]
command = "hugo --environment preview --gc --minify -b $DEPLOY_PRIME_URL"
We can also set different environment variables and override the default ones
[context.deploy-preview.environment]
HUGO_VERSION = "0.141.0"
HUGO_ENV = "preview"
Now our production deployment will only include published posts, while our preview deployment will include future and draft posts.
Netlify Drawer
The last thing to look at is the Netlify Drawer option that we saw earlier, which is optional to use. The Netlify Drawer allows a reviewer (you in the case of a free Netlify account but could be a team member if you are paying for a team in Netlify) to give meaningful feedback. It allows integration while reviewing the site with GitHub, GitLab, Jira, Linear, Loom, Shortcut, and Trello. You can take screenshots (and annotate them), record your screen as a video and add a comment.
When you have the Netlify Drawer turned on and go to your preview site, on the bottom of the screen, you will see the Netlify Drawer bar where you can take your screenshot, record your screen as a video and open up collaboration tools.

If you click on the Deploy Preview on the left side of the bar and then click on the Integrations icon, you can connect your various collaboration tools.
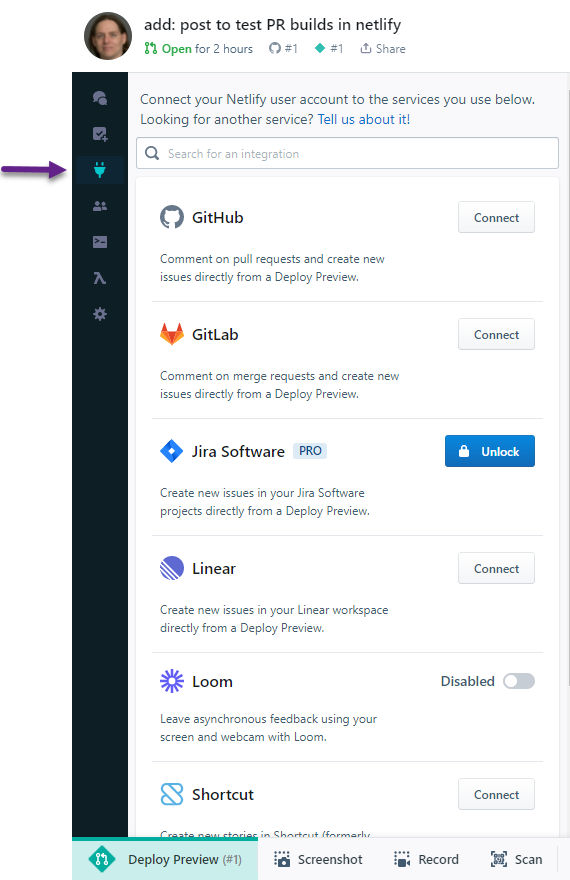
For my integration, I connected GitHub, which enables me to see all of the activity on the pull request, leave a comment, upload a screen/video, and mark comments as resolved.
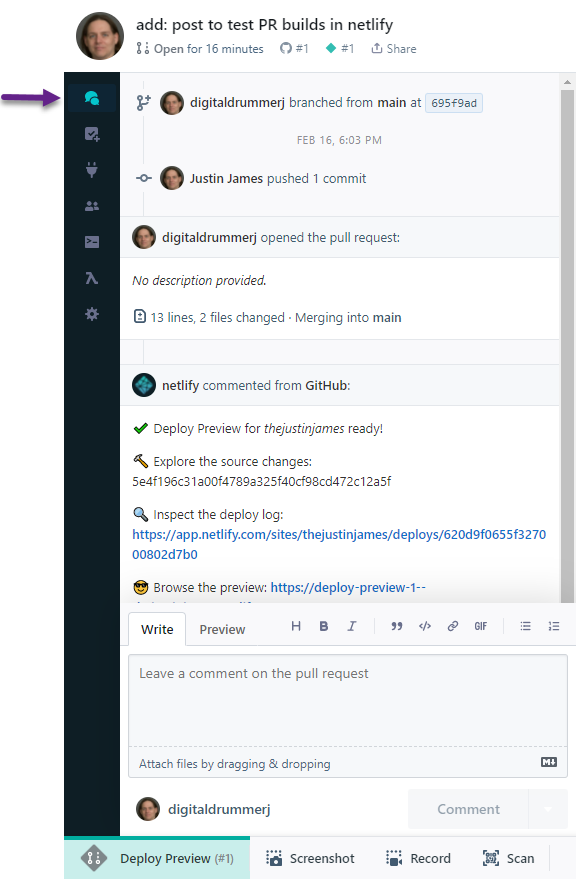
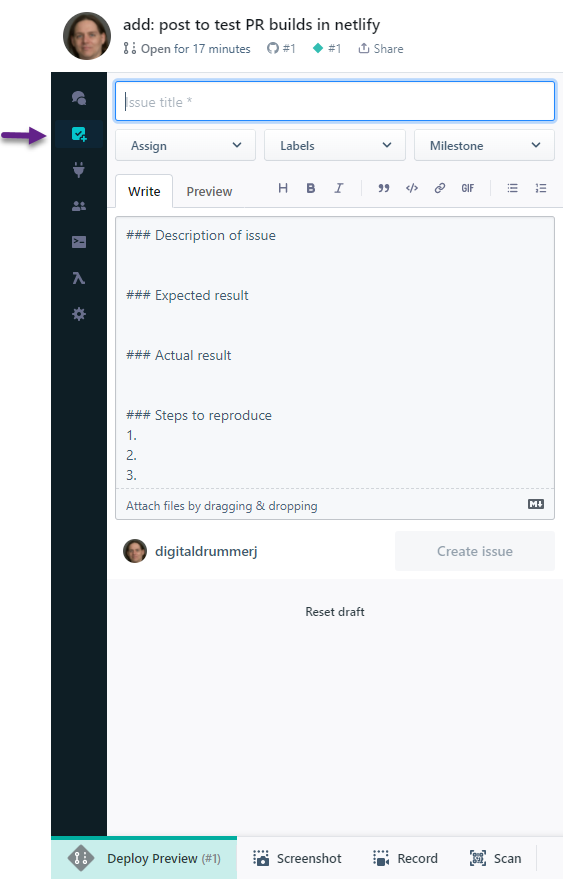
I can also add a GitHub issue to deal with a problem unrelated to the pull request.
That was a lap around how to create, configure and test/review a preview deployment for your site. In our next post on Hugo, we will look at how you can create a staging site that matches the configuration of our production deployment.