Other Views: By Month | By Category | By Tag Cloud
Better Way to Manage Database Views in EF Core Migrations
When using database views that are not directly managed by Entity Framework Core (EF Core), it is a good practice to still version control and I like to do this by including the scripts to add/drop the views in an EF Core migration script. It is easy enough to use the migration builder sql method to call the sql needed to add and drop your view but as the project grows this becomes way harder to manage. One of my projects has 638 migration scripts (it has been going on for like 5 years now), so you can imagine how difficult it can be to find the previous version of the view when you need to drop a migration script and revert back to the previous version of the view.
Recently, we started managing our view in a different way that has made it easier to find the different versions of the view and simplified our migration scripts. In this post, we are going to look at the implementation we did to manage our views.
Xunit Create Generic Exception Tests
Using XUnit, I was creating a bunch of exception test methods that did the same exact test with the only difference being the type of exception being thrown and I thought there has to be a way to use an XUnit theory to only write a single test method and validate the various exception scenarios.
Luckily, it was really easy to accomplish the goal of having a single test method that validated multiple types of exceptions using an XUnit theory but it took a bit to figure how to accomplish this goal.
How to Setup a Development Environment for Companion v3 and ZoomOSC/ZoomISO Module
Bitfocus Companion version 3 is in beta and they have made it way easier to do module development. In this post, we are going to get your computer set up to be able to do Companion module development.
Get NDI working with OBS 29 on Apple Silicon
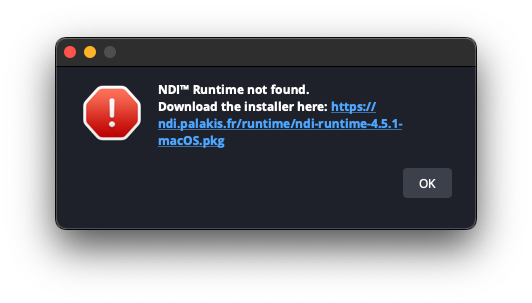
I just got a Mac Mini M2 and needed to get OBS 29 (latest version) working with NDI but no matter what I did I kept getting the following error everytime I started OBS.

How to Completely Uninstall OBS on Mac
As part of troubleshooting why on my Mac Mini M2 NDI was not workign with OBS, I needed to completely uninstall OBS (application, plugins, configurations, etc) so that there was no traces of OBS on the system and then re-install OBS.
EF Core - Configurations That Apply to All Tables
In our previous post, we split all of the entity configurations by table into their own configuration mapping file. The next step is to create a base class that all of the configuration mappings inherit from where we can put configurations that all entities should get.
An example of where we will use the global configuration is the soft deletes that we implement previously where we want to exclude all of the rows that have the IsDeleted flag set to true but we do not want to have to remember to add that code to all of the entities and we don’t want to have to remember to add it to every query.
EF Core - Split Model Configuration Into Files By Table
With EF Core, you configure your entities (e.g. tables) using the OnModelCreating in your database context. It is easy to just put all of the configurations into that OnModelCreating method which for just a few entities works great. However, as the number of entities grows, OnModelCreating easily becomes unwieldy with thousands of lines of configuration code.
In this post, I am going to show you how you can move the configuration for each of your entities to it’s own file and just have to put a single line of code in the OnModelCreating for each entity. This will greatly simplify the management and maintenance of the entity configuration code.
EF Core - Use Enum as Column Value
When dealing with databases, there are times when you want a column to only allow certain values. When using EF Core, the easiest way to accomplish this goal is to use an enum as the type for the property.
In this post, we will add a new column to an entity that is of an enum type, set the default value, and create the migration script.
EF Core - Audit Fields - Track Created By and Last Updated By Values Automatically
In several applications I work on, in addition to the soft deletes that we implemented in the previous post, we also have a requirement to implement audit tracking. Audit tracking is the tracking of who created the record, the date the record was created, who was the last person to update the record, and the last updated date of the record.
In this post, we will implement audit tracking so that the audit fields are automatically added onto our entities and EF Core automatically sets the values when save our entity.
EF Core - Implement Soft Delete
In several applications I work on, we have a requirement that we are not allowed to delete any data out of the database physically. Instead, when we need to delete a record, we set an IsDeleted column to true and exclude the row from our queries.
In this post, we will be implementing soft deletes on an example project.