These days all of our websites are running using https and we should be doing our local development work also using SSL. When you create your Angular project, it uses http by default but has the ability to easily run uder SSL as long as your have a certificate for Angular to use.
Luckily, it is really really easy to generate our own self-signed certificate to use for local development. A self-signed certificate just means that you personally signed the certificate to say it is valid and not one of the trusted authorities on the Internet which is why self-signed certificates only work for your local development.
In this article we will create your own self-signed certificate, tell Windows to trust our certificate and tell Angular to use our certificate for our local development work.
Creating the Certificate
Create a file called certificate.config with the following content
[req]
default_bits = 2048
prompt = no
default_md = sha256
x509_extensions = v3_req
distinguished_name = dn

[dn]
C = US
ST = AZ
L = Phoenix
O = My Organization
OU = My Organization Unit
emailAddress = email@domain.com
CN = localhost

[v3_req]
subjectAltName = @alt_names

[alt_names]
DNS.1 = localhost
Next, we can use OpenSSL to create the certificate. I’m doing this on Windows using Git Bash and using the following command:
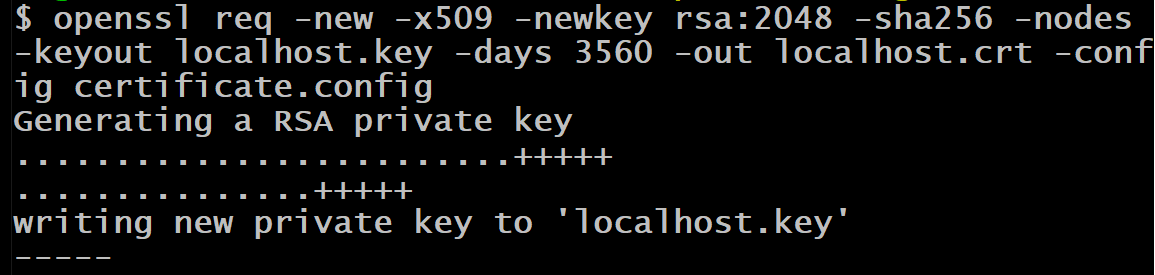
openssl req -new -x509 -newkey rsa:2048 -sha256 -nodes -keyout localhost.key -days 3560 -out localhost.crt -config certificate.configThe output of the openssl command should look like
Running Angular CLI using https
Now that we have our certificate files, it is simple to configure Angular CLI to use these certificates to serve over https. Since these a self-signed certificates, I stored the certificates in a certs folder under my Angular project directory.
To run ng serve with ssl using
ng serve --ssl --ssl-key .\\certs\\localhost.key --ssl-cert .\\certs\\localhost.crtNow open your browser and navigate to https://localhost:4200
When you navigate to the URL in Google Chrome you will be presented with the following warning about the connection not being private.
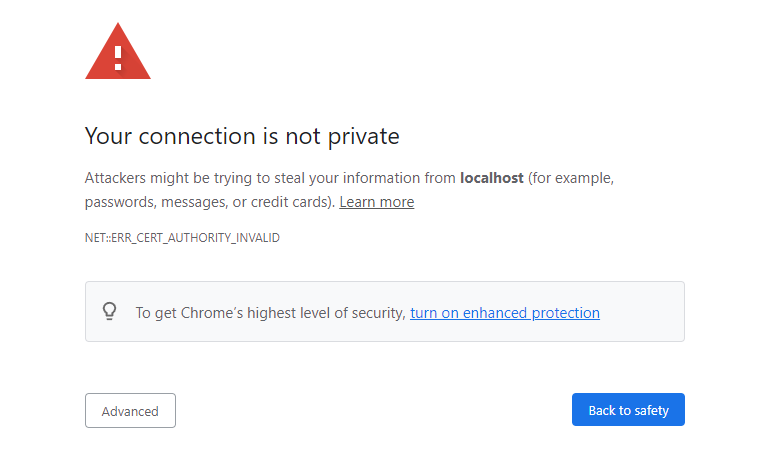
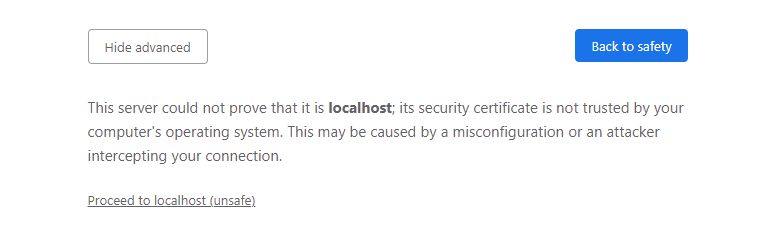
This warning is due to us using a self-signed certificate that is not in the Trusted Root Certification Authorities store. Now you can click the advanced button and then proceed to the site but frankly that is annoying to have to do everytime.
Trusting the certificate on Windows
To get past the Chrome warning about the connection not being private we need to the certificate that we created earlier to the Trusted Root Certification Authorities store.
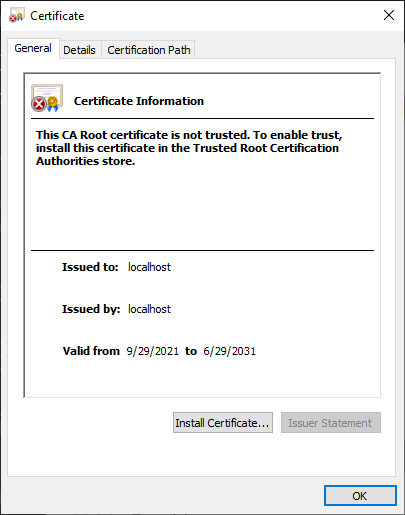
Navigate to the certs directory under our project and open up the localhost.crt file
Click on the Install Certificate button
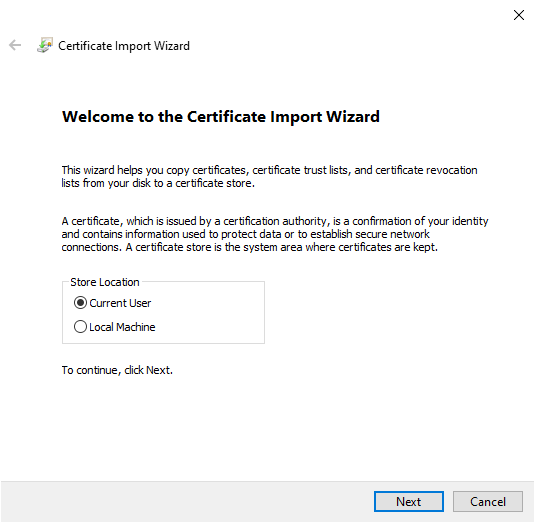
When the Certificate Import Wizard comes up, select Current User as the Store Location and click Next
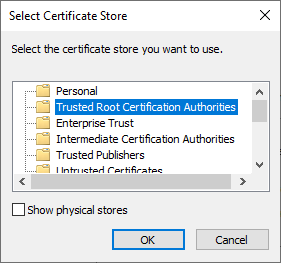
Select “Place all certificates in the following store” then click the Browse button and select “Trusted Root Certification Authorities” and click Next
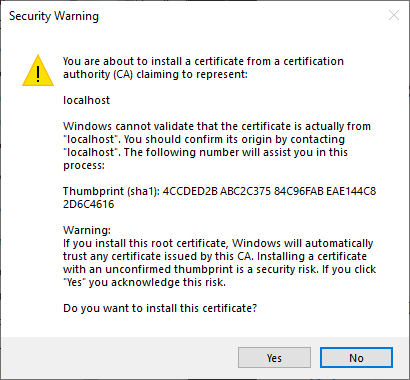
Click Finish and you will be presented with a security warning dialog about the self-signed certificate that you need to click Yes to install the certificate
Click Ok to close the Certificate Import Wizard
Click Ok to close the Certificate dialog
Navigate to https://localhost:4200 and your connection should now be secure with the certificate being trusted.
If the certificate is still not trusted, you will need to close all of your Chrome instances and then open back up Chome and go to https://localhost:4200
Now you can do all of your Angular development using SSL just like you will be using in your production environment which will help ensure that everything will work that same when you go into production.