I was watching the Bald Bearded Builder, Michael Jolley, and I had shell envy as I watched him use PowerShell terminal. His terminal showed the git status, node version, folder/file icons, cool color scheme, and predictive completion when typing commands based on his PowerShell history.
I asked Michael in chat if he would be willing to share his PowerShell profile which he was nice enough to do right then and there on stream.
However, even with his PowerShell profile in hand, it still took me a bit of time to figure out what I needed to do to take advantage of the profile.
Let’s walk through the steps I took to get my shell working like Michael’s.
Several items need to be installed for the profile to work:
- Nerd Font - this is the font that provides the icons for folders and files
- Starship - The minimal, blazing-fast, and infinitely customizable prompt for any shell!
- Terminal-Icons - PowerShell module to display the icons from the Nerd Font
- devtoolbox - a PowerShell module with a bunch of useful aliases for dev tools that Michael released
- PSReadLine - a PowerShell module that allows predictive suggestions as you type a command
Font Install
Nerd Fonts patches developer targeted fonts with a high number of glyphs (icons). Specifically to add an increased number of extra glyphs from popular ‘iconic fonts’ such as Font Awesome, Devicons, Octicons, and others.
I am using the CaskaydiaCove Nerd Font from Nerd Font.
To install:
- Open Windows Terminal as an Administrator
- Create a Powershell tab
- Install the Chocolatey package
choco install -y cascadia-code-nerd-font
If you are not using Chocolatey, you can install it at https://chocolatey.org/install
- After the font is installed, I needed this registry entry to tell Windows that the font is a TrueTypeFont
$key = 'HKLM:\SOFTWARE\Microsoft\Windows NT\CurrentVersion\Console\TrueTypeFont'
Set-ItemProperty -Path $key -Name '000' -Value 'CaskaydiaCove Nerd Font'
Next, we need to tell Windows Terminal to use the CaskaydiaCove Nerd Font that was just installed.
- In Windows Terminal, Open settings by pressing ctrl+, or clicking on the down arrow in the title bar and select Settings
- On the bottom of the left navbar, click on Open JSON file
- Find the defaults sections under profiles and add the “font” section below
{
  "profiles":
  {
      "defaults":
      {
          // Put settings here that you want to apply to all profiles
          "font": {
              "face": "CaskaydiaCove Nerd Font",
              "weight": "normal"
          }
      }
  }
}
Starship
Next, we need to install Starship, the minimal, blazing-fast, and infinitely customizable prompt for any shell!
You install Starship using Chocolatey
choco install -y starship
Now that we have Starship installed, we need to add it to our PowerShell profile.
Open PowerShell
Open the profile by typing
notepad $profileAdd the following line at the top of the profile and save it
Invoke-Expression (&starship init powershell)
Terminal-Icons
Terminal Icons is a PowerShell module to show file and folder icons in the terminal.
To install, open PowerShell and run:
Install-Module Terminal-Icons -Scope CurrentUserTo use the Terminal Icons, add the following line to your PowerShell profile
Import-Module Terminal-Icons
devtoolbox
devtoolbox is a set of aliases for common developer command for docker, docker-compose, and git.
You can install devtoolbox from the PowerShell Gallery
Install-Module -Name devtoolbox
To use the devtoolbox now that we have installed it, open up your PowerShell profile and add the following statement.
Import-Module devtoolbox
PSReadLine Predictions
For the predictive suggests when typing commands, we need to install PSReadline.
In a PowerShell administrator shell, run
Install-Module PSReadLine -RequiredVersion 2.2.2 -Force
Needed to use -Force to have it install PSReadLine 2.2
To our PowerShell profile, we need to add the following lines:
Import-Module PSReadLine

Set-PSReadLineOption -PredictionSource History
Set-PSReadLineOption -PredictionViewStyle ListView
Set-PSReadLineOption -EditMode Windows
update function
The update function is designed to make it easy to update powershell to the latest version
function update {
  iex "& { $(irm https://aka.ms/install-powershell.ps1) } -UseMSI"
}
I would suggest that you run the update command and install the latest cross platform version. Once you get the cross-platform version installed, you need to install the PowerShell modules above and create the profile.
profile ended
The last piece is to set up the profile function to launch the profile into VSCode quickly.
function profile {
  code $profile
}
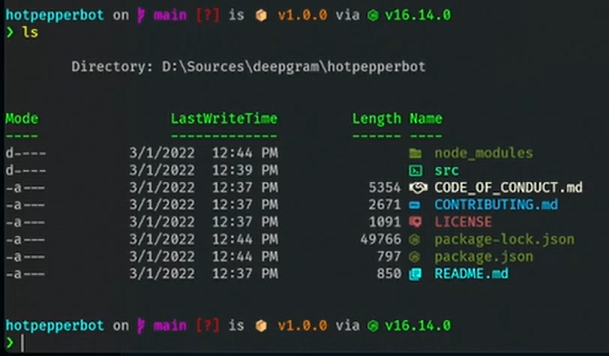
Now your prompt is just like Michael’s.
Full PowerShell Profile
There is a couple of bonus functions like getting a random fact, a dad joke, convert a temp to C, and convert a temp to F.
Originally posted by Michael Jolley
Invoke-Expression (&starship init powershell)
Import-Module Terminal-Icons
Import-Module devtoolbox
Import-Module PSReadLine

Set-PSReadLineOption -PredictionSource History
Set-PSReadLineOption -PredictionViewStyle ListView
Set-PSReadLineOption -EditMode Windows

function fact {
  irm -Uri https://uselessfacts.jsph.pl/random.json?language=en | Select -ExpandProperty text
}

function joke {
  irm https://icanhazdadjoke.com/ -Headers @{accept = 'application/json'} | select -ExpandProperty joke
}

function 2C {
  param (
      [Parameter()]
      [Alias('Temp')]
      [int]
      $Temperature
  )

  ($Temperature - 30) / 2
}

function 2F {
  param (
      [Parameter()]
      [Alias('Temp')]
      [int]
      $Temperature
  )

  ($Temperature * 2) + 30
}

function update {
  iex "& { $(irm https://aka.ms/install-powershell.ps1) } -UseMSI"
}

function profile {
  code $profile
}