In our previous post on Deploying a Preview Release of Site Using Netlify, we set up Netlify to build and deploy a preview of our site every time we created or updated a pull request that also included all of our draft and future posts.
In this post, we will look at how to deploy a git branch every time a commit is pushed to the branch to test out what our production site will look like before deploying to production. Unlike the preview deploy in the last post, the staging deployment will not include draft and future posts and mirror the production site configuration.
Adding Netlify Configuration for Branch
In our previous post, we created our Netlify configuration file, netlify.toml, at the root of our site.
In this post, we will add our staging configuration to the netlify.toml file.
At the bottom of the netlify.toml file, add the staging configuration. In this case, staging is the branch name. If your branch name is different, please update the “staging” text
# This will be your staging build
[context.staging]
command = "hugo --gc --minify -b $DEPLOY_PRIME_URL"

[context.staging.environment]
HUGO_VERSION = "0.92.1"
Commit and Push the netlify.toml change to your main branch
Netlify Setup for Branch Deploy
We are now going to set up Netlify to build the staging branch that we will create later in this post.
Log in to Netlify
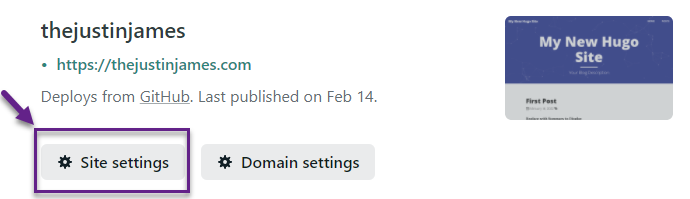
Click on the site that you want to add the staging deploy to
Click on the Site Settings
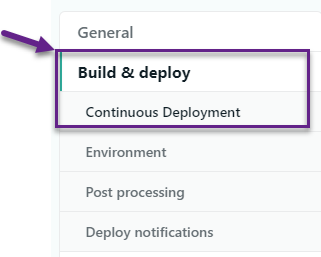
Click on the Build & Deploy in the Sidebar
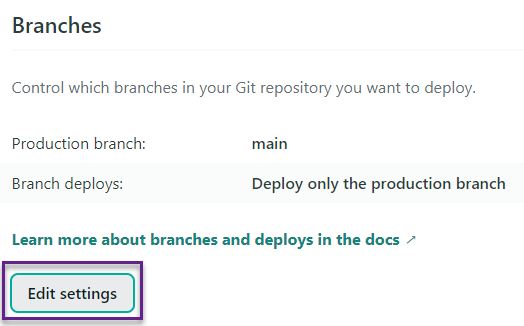
Scroll down until you see the Branches section and click the Edit settings button.
By default, Netlify only builds your production branch.
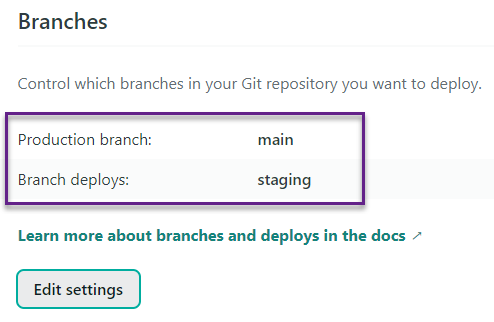
You can decide to either build All branches that are deployed or individual branches to deploy in addition to your production branch. In this case, we only want our staging branch to be deployed.

Now, it will show that it will deploy your production and staging branches
Go to GitHub and create your staging branch
After you have created your staging branch, Netlify will automatically deploy it.
View Staging Deployment
In Netlify, you can view the deployment by clicking on the Deploys in the top menu under your site.
In the list of deployments, you will see a deployment for the staging branch.

You can view the staging deployment by clicking on the “Branch Deploy” text in the build summary.
If you get an error that the build failed, check the build logs for the command used for the build and make sure it was the hugo command that we set up. Most likely the netlify.toml file is missing the branch deploy section that matches the branch name.

Now we can test our site on a test server by pushing commits to the staging branch. This is a great way to ensure that everything is working correctly before deploying to production. This is especially helpful when making more changes than just the content of a post.