Hugo - Add Google Analytics
It is really helpful to understand how your site is performing with respect to which posts are getting the most views, how long are people staying on your site, where in the world they are viewing your site from and where did your traffic come from.
To get analytics for this site, I am using Google Analytics which is free.
In this post, we will enable Google Analytics on our Hugo site.
Hugo - Set Default Front Matter When Creating Post
Did you know that when you create a new post in Hugo that you can set the default front matter set for you?
I didn’t know either until after I had done over 50 posts where I created all of my posts files and front matter by hand. Whereas I could have had Hugo create the files for me and set default front matter that I wanted.
In this post, we will look at how you can also set your default front matter for your post.
Hugo - Dynamically Add Copy Code Snippet Button
I have many posts on this site that include code snippets for the reader to cut and paste into their code. From a usability perspective, instead of always making the user select lines from the code snippet to copy and paste, we can add a copy button to the code snippet.
example without line numbers:

example with line numbers:
This post will look at how to implement the copy button, as you see in the above images, any time that we detect a code snippet on a post.
Hugo - Add Preview When Sharing to Twitter
When you share your blog post on Twitter, you can attach photos, videos and media experiences to Tweets, which helps to drive traffic to your site.
This is called a Twitter card and looks like:
There are two types of Twitter Cards that we are concerned with for our site
- Summary Card: Title, Description, and Thumbnail (optional)
- Summary Card with Large Image: Similar to the Summary Card but with a prominently featured image
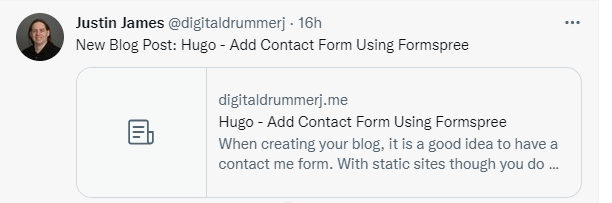
Hugo - Add Contact Form Using Formspree
When creating your blog, it is a good idea to have a contact me form. With static sites though you do not have server side processing available to send you an email with from the contact me form submission.
To overcome not having server side processing available, we are going to use Formspress.
Formspree is free for up to 50 submissions per month.
Hugo - Create a 404 Page
Every website should have a 404 page for when a user tries to go to a page that does not exist.
Hugo out of the box does not provide you with a nice 404 page but we can create a 404 page just like any other page. Creating the page though is the easy part. The hard part is getting the 404 page to display when a user goes to an invalid url as it depends on your website host to set up the 404 page redirect0000.
For this site, I am hosting it using Netlify and they automatically pick up my 404 page.
Let’s take a look at how to create our 404 page.
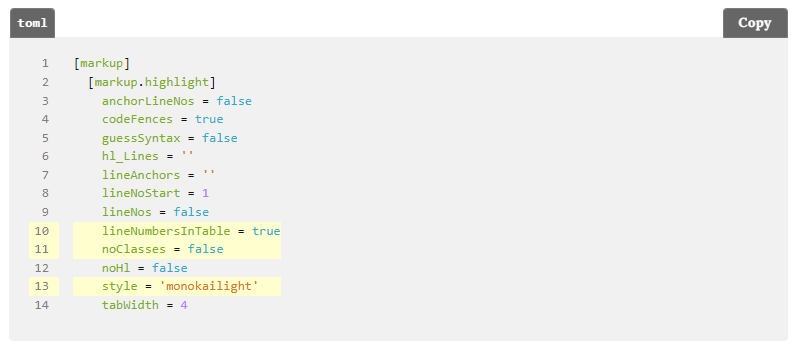
Hugo - Minify JS and CSS
When you think about a website’s performance, you should minify your CSS and JavaScript file so that they download as quickly as possible. This still holds true even with static sites like Hugo. Luckily, Hugo can minify files out of the box using what Hugo calls Asset Pipeline.
In this post, I will show you how to take advantage of the Hugo Asset Pipeline to minify your CSS and JavaScript.
Hugo - Integrate Google Search
As your site content grows, finding content will become harder and you will need to add the ability to search your content.
You could create your own client search using something like lunr.js but then you have to maintain the search code and deal with any issues that come up. To me this is a distraction from the real goal of publishing content on your site.
So instead, I prefer to harness the power of Google to search my site using the handy search argument site: to tell Google to just search my site for the search term.
In this post, we are going to create a search page that will take the reader to Google for the search results.
Hugo - Add Additional Non-Blog Pages
So far in our Hugo series we have only looked only blog related page such as posts and archives but typically you have other pages such as an about, search, or contact us.
In this post, we are going to take a look at how you can add an about page.
In future post, we will look at the search and contact pages. They follow the same instructions but the layout/content is much different than just a headshot and bio.
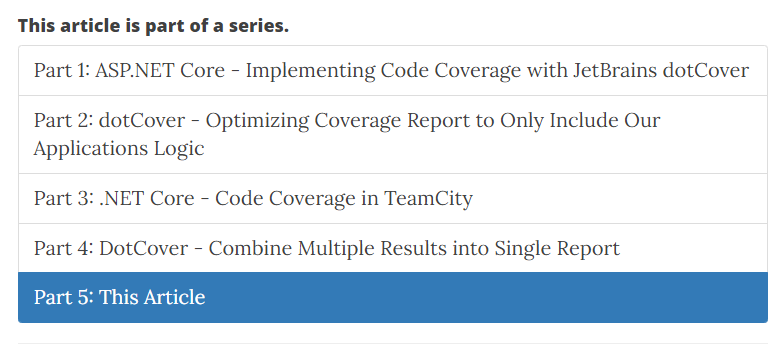
Hugo - Create a Post Series
When writing a blog, sometimes you want to write a multiple part posts that are meant to be read in order and you want to display to the reader that the post is part of a series, where the post is in the series and a link to get to the other posts in the series.
Out of the box, Hugo does not offer the ability to display the list of posts that are part of the series. Luckily, Hugo has all of the pieces to create one yourself, which we are going to do in this post.
Here is an example of what we are going to build.
Hugo - Selectively Add Table of Contents to Post
When you are doing a longer tutorial style post, it is helpful to include a table of contents that will show all of the headings in the post and link to that portion of the post. In this post, we will look at how you can selectively add a table of contents to a post.
Hugo - Open External Links in a New Tab
For Hugo based websites, when a link goes to an external website, I prefer to have them open in a new browser tab.
Hugo - Create Custom Shortcodes
In our previous post, we took a look at Hugo shortcodes which are HTML snippets that you can use as a way to extend the html that is generated by Hugo. There are several shortcodes built-in to Hugo but you can also easily create your own custom shortcodes. In this post, we are going to take a look at how to create our own shortcode.
Hugo - Use Shortcodes Instead of Embedding HTML in Your Markdown
Welcome back to the Hugo series. In our last post, we added an RSS feed to our site. In this post, we are going to look at how to extend the output of the HTML that is generated by Hugo for a post.
When creating a post, there are times where you really wish Hugo could render something fancier than the basic HTML that markdown to html provides. Maybe you want to add a caption to an image or embed a YouTube video or include a gist. You could embed the HTML within your markdown file, but that makes your markdown file messy, harder to read, and a bit of a pain if you need to update the HTML across all your posts.
This is where Hugo shortcodes come into play. Shortcodes are simply a way of inserting a snippet of HTML into a page from your markdown.
Let’s take a look at how to use the built-in shortcodes.
Hugo - Create RSS Feed for Site
If you have a Hugo site, you probably already have a working RSS feed. You just might not know about it!
Hugo comes with a built-in RSS Template that generates the necessary RSS XML for you. Often, this internal template is good enough, and you just need to include the feed links in the correct places.
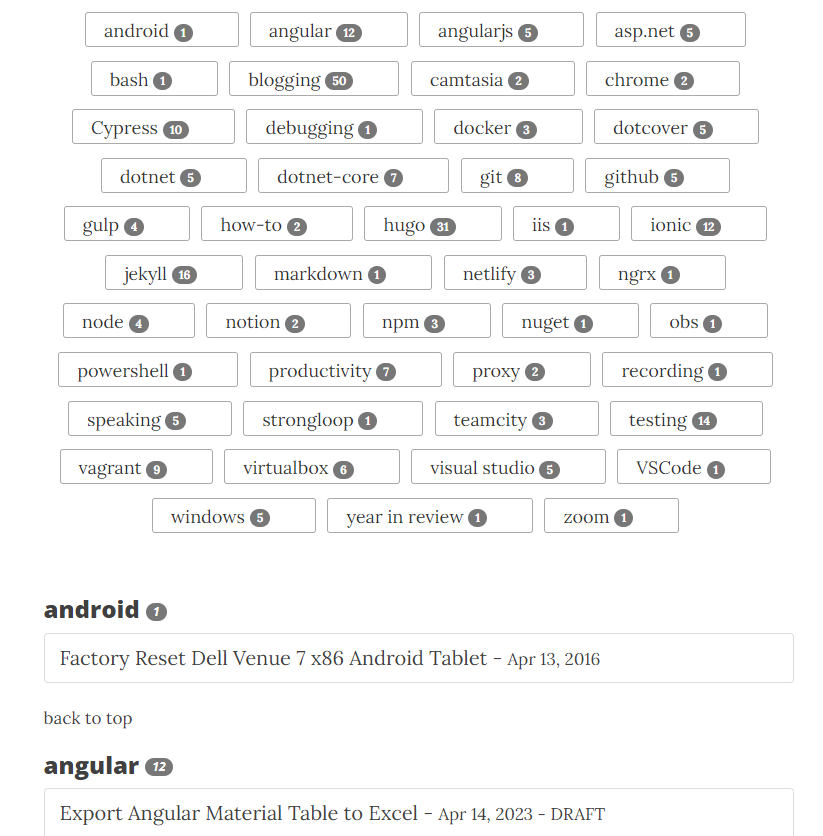
Hugo - View Posts by Tag Cloud
In our previous post on Hugo, we created a page to view the post grouped by category and a page to view all posts for a category.
In this post, we are going to build a similar post list page but this time we are going to look at the list using a tag cloud. A tag cloud is a visual representation of our categories using font size and weight to highlight which categories have more posts.
example tag cloud:

Hugo - View Posts Grouped by Category
In our previous post, we create a page to view our posts grouped by month. In this post, we are going to create a page to show post grouped by category.
Example of What We Are Building:
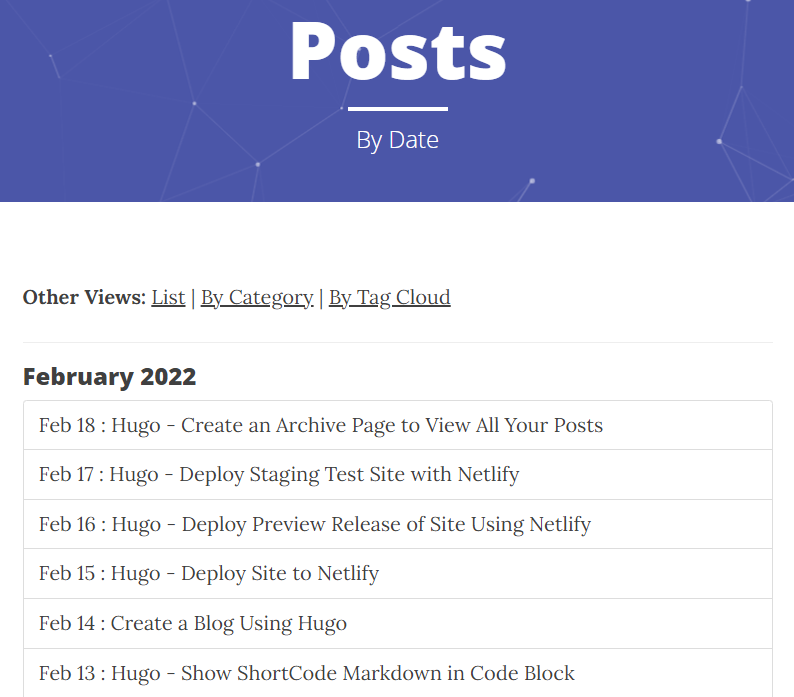
Hugo - View Posts Grouped By Month
In our previous post, we looked at how to build an archive page to view all of the posts we have written. In this post, we will build an archive page that shows our posts by month.
Example of What We Are Building:
Hugo - Create Page to View All Your Posts
In our post on Creating Your Blog Using Hugo, the theme that I provided you included the archive page that allows you to page through all of the posts you have written. By default, Hugo only shows 10 posts at a time and then you need to have an archive page that pages through the remaining posts. Even though I provided you with the archive page, I want to examine how that page works so you know how you can customize the page to match the look and feel you want.
Hugo - Deploy Staging Test Site with Netlify
In our previous post on Deploying a Preview Release of Site Using Netlify, we set up Netlify to build and deploy a preview of our site every time we created or updated a pull request that also included all of our draft and future posts.
In this post, we will look at how to deploy a git branch every time a commit is pushed to the branch to test out what our production site will look like before deploying to production. Unlike the preview deploy in the last post, the staging deployment will not include draft and future posts and mirror the production site configuration.
Hugo - Deploy Preview Release of Site Using Netlify
HUGO_VERSION = “0.141.0"site every time we pushed a commit to our GitHub repository. As well, we set up a custom domain for our site.
In this post, we will look at the preview deploy feature of Netlify to build and deploy to a preview/staging site when we create or update a pull request.
When you create a new Netlify site, a preview site is set up out of the box to build every time you create or update a pull request. The build configuration will match the configuration of your production site. It is fantastic that Netlify set this up for us. However, to take full advantage of having a preview site, it would be helpful to include future and draft posts to make sure they look right before publishing them to production. It would also be nice to be able to test new versions of Hugo in a preview environment before updating production.
Hugo - Deploy Site to Netlify
In our previous post on Creating a Blog Using Hugo, we installed Hugo, created a new site, added a theme, and created our first post.
In this post, we will be deploying the site that we created using a free account at Netlify. The site will be re-built and re-deployed whenever we push a new commit to our site’s Git repository. We will also look at how to set up our site using our own domain and create an SSL certificate.
Create a Blog Using Hugo
Are you ready to capturing and sharing your knowledge with others by creating a blog?
Then this series on Hugo is what you are looking for. Even if you have never used or heard of Hugo you will be able to create your blog and deploy it.
In this series of post on Hugo, we are going to build a full blog based on this website. By the end of the series, you will be able to add posts, have a page to view past post by date/category/tag, have an rss feed so people can subscribe to your blog, be able to add pages such as contact, search and about plus we will dig into several useful Hugo features to take some of the work out of creating your blog and post.
Hugo - Show ShortCode Markdown in Code Block
I was trying to add a code block to a post to show how to generate an html figure using the Hugo built-in figure shortcode and it instead of showing the markdown of the figure, it kept rendering the actual figure.
I could have just took a screenshot of the code but the whole point of having the code block is to make it easier for you the reader to easily copy and paste the code. The key to making this work is knowing how to escape the figure shortcode within the code block so that Hugo renders it as a code block and not a figure.
Automatically Tweet New Blog Post
After each blog post is published, we need to let people know that a new post is published. We can’t expect people to only find out about the new post through the RSS feed. For this blog, I tweet out that I have a new blog post. However, I don’t want to have remember to send out the tweet because I will forget or get busy with something else. Instead, sending out a tweet should be done for me.
Jekyll Tip: Showing Liquid Code in Code Snippets
When blogging with Jekyll there are times when you want to be able to output a code snippet that contains what Jekyll thinks is liquid code. This especially happens when you are doing Angular tutorials since using the double brackets ({{ }}) for data binding. Since the code snippets are enclosed in a pre tag, you are not able to html encode the brackets.
Instead, to include liquid markup in the code snippet you need to surround the code snippet with the raw and endraw tags like so
Jekyll Tip: Adding Styling To Html Output
As I was writing some tutorials recently I wanted to be able to style the html elements that Jekyll outputs with different css classes without having to write the actually html in the markdown.
For example I wanted to use a blockquote for items to be aware of that has a blue highlight as well as warnings to watch out for that has a red highlight. Here is the output of the blockquote with the different styles.
Add Table of Contents to Markdown
When you are writing tutorials that are broken up by sections it is nice to have a table of contents at the top to help the users navigate. However, maintaining this by hand is a no go. Luckily there is a great npm package called doctoc that will look at the headings in your markdown file and generated a table of contents for you.
Table of Contents Sample Using This Post
Jekyll Part 14: How To Validate Links and Images
Welcome the continuing series on using Jekyll. In this tutorial we are going to go through how you can validate your link and image references.
As your blog grows and you get more posts, it becomes harder to validate images and links are still valid on older post. On new post it is pretty easy since you only have one last to look for. However, this is a process that can be fully automated so got don’t even have to worry about it anymore.
Jekyll Part 13: Creating an Article Series
Welcome the continuing series on using Jekyll. In this tutorial we are going to go through how to create the series listing like you see for this blog series.
Overview
Sometimes a blog post gets too big and you need to split it into multiple articles or you want to do a series like this one that builds upon each other but you don’t want to have to manage a listing of all of the post in the series. Instead you can easily create a liquid template that does all of the work for you.
Jekyll Part 12: Editing Locally
Welcome the continuing series on using Jekyll. In this tutorial we are going to set it up so that we can do draft posts that we can check into our repo but not have them show up on the production site.
Overview
In the last couple of articles, we installed jekyll locally but we didn’t talk about editing existing blog post or adding in new ones. There will be times where you will start a blog post but not have time to finish it all in one sitting. You could just create all of the files in the post directory and set the publish flag to false but over time it will become harder and harder to tell which articles have actually been published.
Jekyll Part 11: Installing Jekyll On OSx
Welcome the continuing series on using Jekyll. In this tutorial we are going to setup your MAC (OSx) computer to be able to edit your blog on your computer.
Overview
Up to this point we have been using the Github web site to edit all of our files but the downside to this is that any chances you want to make show up live in your blog before you have had a chance to test them.
Jekyll Part 10: Installing Jekyll On Linux
Welcome the continuing series on using Jekyll. In this tutorial we are going to setup your Ubuntu Linux computer to be able to edit your blog on your computer.
Overview
Up to this point we have been using the Github web site to edit all of our files but the downside to this is that any chances you want to make show up live in your blog before you have had a chance to test them.
Jekyll Part 09: Installing Jekyll On Windows
Welcome the continuing series on using Jekyll. In this tutorial we are going to setup your Windows computer to be able to edit your blog on your computer.
Overview
Up to this point we have been using the Github web site to edit all of our files but the downside to this is that any chances you want to make show up live in your blog before you have had a chance to test them.
Jekyll Part 08: Using a Custom Domain
Welcome the continuing series on using Jekyll. In this tutorial we are going to setup a custom domain for your blog.
Overview
Part of having a blog is making it your own and giving it personality. One of the easiest ways to do this is to use a custom domain name that fits the blog. So far we have been using http://[username].github.io to get to your blog, but now we will go through the process of setting up a custom domain name like http://digitaldrummerj.me. At first it might seem like this is going to be complicated but it is actually very easy to set this up.
Jekyll Part 07: Adding a custom Google search
Welcome the continuing series on using Jekyll. In this tutorial we are going to add the ability to search your blog using google.
Overview
As your blog grows, you want to make it easy for your readers to find the content that they need on your blog. Out of the box, Jekyll does not have any type of search engine built-in. Thankfully, with Google you can easily tell Google to index your blog and then add a search box on the blog.
Jekyll Part 06: Adding Post by Date Page
Welcome the continuing series on using Jekyll. In this tutorial we will go through creating a page to show blog post by date.
Overview
A typical blog has a way for your readers to view posts by either category or date, so that they can look at your archives without having to go through the blog post one by one and page by page. In the last lesson, we added the post by category page. In this lesson we will add the post by date page.
Jekyll Part 05: Adding Category Page
Welcome the continuing series on using Jekyll. In this tutorial we will go through creating a page to show blog post by category.
Overview
A typical blog has a way for your readers to view posts by either category or date, so that they can look at your archives without having to go through the blog post one by one. Unfortunately, the Jekyll-Now repository that we cloned your blog from, does not have these pages. Luckily, these pages are really easy to create.
Jekyll Part 04: Adding Additional Pages
Welcome the continuing series on using Jekyll. In this tutorial we will go through how to add an additional page such as the speaking page on this blog.
Overview
As your blog grows you are going to want to add additional information besides just blog post. If you start speaking at events or want to show off your portfolio or blog post by category/date, you are going to want these as separate pages. These pages most likely will have there own look and feel as well.
Jekyll Part 03: Adding Commenting to Post
Welcome the continuing series on using Jekyll. In this tutorial you will learn how to add the ability for users to comment on your blog post.
Overview
You may be thinking that commenting isn’t really that important but it is a key feature for you to be able to interact with your readers. Users want to have conversations about your blog post with you and to feel connected to you. It is also a good way for you to learn from them as well.
Jekyll Part 02: Your First Post
Welcome the continuing series on using Jekyll. In this tutorial we will go through making your first blog post.
Overview
We will go through all of the steps to create a new post, add metadata such as title/categories/tags/date, and then make it live on the site.
Section 1: Creating the file
Thr first step is to create a new file to hold the content of the blog post. In Jekyll all of the blog post are markdown files and are stored in the _post directory. When you commit this file to Github, it will be compiled into a static html page.
Jekyll Part 01: Getting Started
Welcome to the first tutorial of a multi part series on blogging using Jekyll on Github. Github has an awesome free option for hosting a blog for you and you can get a blog up and running in 10 minutes or less. This series will cover everything that you to know to host, manage and customized a Jekyll blog that is hosted on Github.
Section 1: Overview
Github uses the Jekyll engine which turns markdown into static Html pages. The advantage of this is that performance is better since you are just serving up html and you don’t have to worry about hosting a database somewhere .