Are you ready to capturing and sharing your knowledge with others by creating a blog?
Then this series on Hugo is what you are looking for. Even if you have never used or heard of Hugo you will be able to create your blog and deploy it.
In this series of post on Hugo, we are going to build a full blog based on this website. By the end of the series, you will be able to add posts, have a page to view past post by date/category/tag, have an rss feed so people can subscribe to your blog, be able to add pages such as contact, search and about plus we will dig into several useful Hugo features to take some of the work out of creating your blog and post.
If you have not heard of Hugo before, Hugo is a static site generator. A static site generator renders your content into HTML files and you only have to deploy the HTML to your web server. No database is needed. No fancy hosting service. No Wordpress site. In fact, you can run your site using GitHub pages for free.
Hugo Install
The first thing we need to do is install Hugo.
For Windows I prefer to use Chocolately to manage my applications installs and upgrades. For Hugo, Chocolatey does have a package available for us to use.
By using Chocolately, I can install Hugo and get Hugo available on my environment path with a single command.
If you do not have Chocolatey installed already, go to https://chocolatey.org/install and install it first
Open up a command prompt as an administrator
Install Hugo
choco install -y hugo
When a new version of Hugo comes out you can update your Chocolatey package but running choco upgrade -y hugo
Create a New Site
Now that we have Hugo install, we need to create a new website.
Open up a command prompt
Navigate to the directory where you store your repositories or code.
Run the following to create a new Hugo site in a folder name, MyBlog
hugo new site MyBlog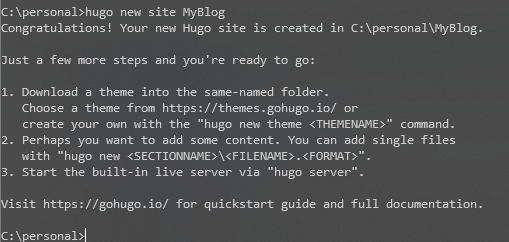
Add a Theme
At this point we only have a shell of a website. For the design is the website, Hugo allows us to add themes to control the look and feel.
There are two ways to install a theme. You can make the theme a git submodule or you can download the theme and unzip it into the themes directory under your website.
There are pros and cons to both options.
git submodule pros:
- it is easy to update the theme with any changes the theme author makes.
- fastest way to get started with a theme
git submodule cons:
- changes you make to the theme will not be seen by git
- you have to remember to init the submodule after clone
- you have to remember to update the submodule, git pull for your site does not update the submodule.
- if the theme author decides to delete the theme repository and you don’t have a local copy, your theme is lost.
download theme pros:
- the theme is stored along with your site and any changes you make to it are stored with your site
- you do not have to worry about the theme repository going away
- you have the most control of your theme
download themes cons:
takes a little bit more work to start using theme since you have to download and unzip it.
you will have to manually merge any changes the theme author makes into your version of the theme.
In my experience, themes rarely get updated after their release
My preference is to download the theme so that I have full control over it and don’t have to worry about the theme repository going away.
As well for this series on Hugo, we will be starting with a basic starter theme and then adding and modifying the theme so you will want to have the theme installed locally.
To install the theme:
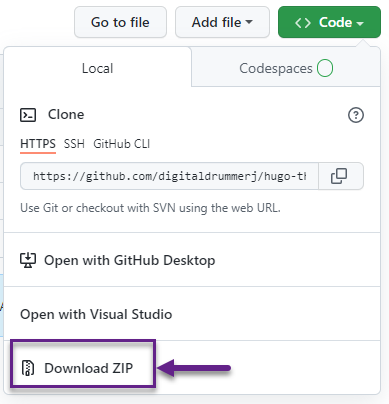
Go to https://github.com/digitaldrummerj/hugo-theme-bootstrap
Click on the green code button and then click the Download ZIP
Unzip the download to the themes directory
Rename hugo-theme-bootstrap-main to bootstrap
Open the config.toml file that is in the root of your site and add the following line to tell Hugo to use the theme. The value of the theme parameter, is the directory name of the theme under Themes.
theme = "bootstrap"
If you want to use a different theme, you can find a good amount of themes available at https://themes.gohugo.io/
Add Some Content
Now that we have our site and theme setup, we are ready to create our first blog post.
Post in Hugo use markdown for the content and are stored in the content/post directory.
Open a command prompt
Navigate to your website folder
Run the hugo new command to create a new post
hugo new posts/my-first-post.md
Start Web Server
We are now ready to see what our side looks like and start up the built-in Hugo web server
From our command line that we already have open, run:
hugo server -D -Fthe -D argument tells Hugo to include draft post the -F argument tells Hugo to include future dated post that are published
Open your browser and navigate to http://localhost:1313
Your blog is now up and running with your first post. In our next post on Hugo, we will take a look at how to deploy our site using the free version of Netlify so that every time we push commits to our GitHub repository, our site will update itself.