Other Views: By Month | By Category | By Tag Cloud
ASP.NET - Selectively Run Health Checks
In part 1 we create our basic ASP.NET Core health check and then in part 2 we changed from plain text “Healthy” or “Unhealthy” to a json response that let us know the stauts of each health check.
In our previous post, we have only have a single health check so it has been ok to have all health checks run when we hit our health check endpoint. However, if we had multiple health checks we are going to want to be able to run them by themselves as well as run the whole suite.
In this post, we will are going to add the ability to selectively run our health checks and create endpoints that will run either a set of health checks or all of the health checks.
ASP.NET - Health Checks - Generate Better Response Than Just Text
In our previous post, we added a simple health check to our ASP.NET Core application. Although we only added a single health check, you can add multiple health checks and have multiple run as once. Regardless if you run a single or multiple health checks, the implementation out of the box, just returns a “Healthy” or “Unhealthy” string, which is not overall helpful to know which component actually failed.
In this post, we are going to update our health check response to return a json record that will let us know the status of each health check that is run as well as the overall health status of the application.
{
    "status": "Healthy",
    "duration": "00:00:00.0066738",
    "info":
    [
        {
        "key": "ExampleHealthCheckAsync",
        "description": "Health Msg Here.",
        "duration": "00:00:00.0010113",
        "status": "Healthy",
        "data": {}
        }
    ]
}
ASP.NET Core - Add Health Checks
If your ASP.NET Core application communicates with any 3rd party systems, it is beneficial to have health checks to determine if your connection to the 3rd party system is healthy, degraded, or unhealthy.
With ASP.NET Core, Microsoft references Microsoft.AspNetCore.Diagnostics.HealthChecks package implicitly for ASP.NET Core apps. This means that everything you need architecture wise is available and you just need to create your actual health check code.
Hugo - Add Google Analytics
It is really helpful to understand how your site is performing with respect to which posts are getting the most views, how long are people staying on your site, where in the world they are viewing your site from and where did your traffic come from.
To get analytics for this site, I am using Google Analytics which is free.
In this post, we will enable Google Analytics on our Hugo site.
Hugo - Set Default Front Matter When Creating Post
Did you know that when you create a new post in Hugo that you can set the default front matter set for you?
I didn’t know either until after I had done over 50 posts where I created all of my posts files and front matter by hand. Whereas I could have had Hugo create the files for me and set default front matter that I wanted.
In this post, we will look at how you can also set your default front matter for your post.
Git: Delete Merged Local Branches That No Longer Exist with Powershell
Previously, I wrote about how to delete git branches that have been merged and no longer exist on the remote using git bash. Using git bash worked just fine for this. However, my normal shell is PowerShell and I want to stay in PowerShell.
In this post, we will look at how to use PowerShell instead to delete your local git branches that have been merged and no longer exist on the remote.
Hugo - Dynamically Add Copy Code Snippet Button
I have many posts on this site that include code snippets for the reader to cut and paste into their code. From a usability perspective, instead of always making the user select lines from the code snippet to copy and paste, we can add a copy button to the code snippet.
example without line numbers:

example with line numbers:
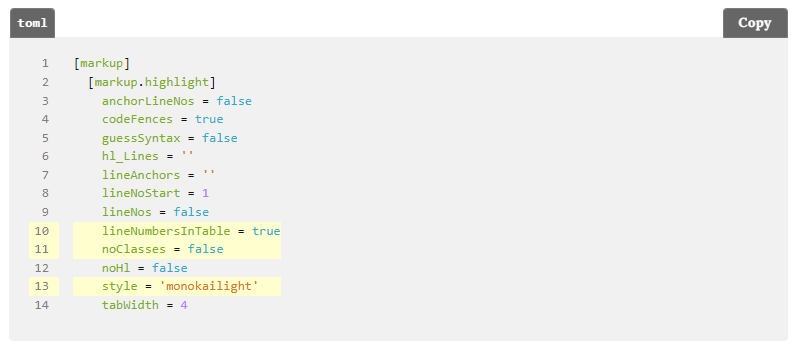
This post will look at how to implement the copy button, as you see in the above images, any time that we detect a code snippet on a post.
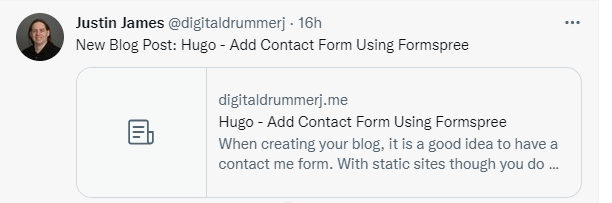
Hugo - Add Preview When Sharing to Twitter
When you share your blog post on Twitter, you can attach photos, videos and media experiences to Tweets, which helps to drive traffic to your site.
This is called a Twitter card and looks like:
There are two types of Twitter Cards that we are concerned with for our site
- Summary Card: Title, Description, and Thumbnail (optional)
- Summary Card with Large Image: Similar to the Summary Card but with a prominently featured image
Hugo - Add Contact Form Using Formspree
When creating your blog, it is a good idea to have a contact me form. With static sites though you do not have server side processing available to send you an email with from the contact me form submission.
To overcome not having server side processing available, we are going to use Formspress.
Formspree is free for up to 50 submissions per month.
Hugo - Create a 404 Page
Every website should have a 404 page for when a user tries to go to a page that does not exist.
Hugo out of the box does not provide you with a nice 404 page but we can create a 404 page just like any other page. Creating the page though is the easy part. The hard part is getting the 404 page to display when a user goes to an invalid url as it depends on your website host to set up the 404 page redirect0000.
For this site, I am hosting it using Netlify and they automatically pick up my 404 page.
Let’s take a look at how to create our 404 page.